

Protect Your Investment: The Ultimate Camper Shell Maintenance Guide

So, you’ve got yourself a camper shell (or truck topper, depending on where you’re from). It’s the ultimate upgrade for your truck—keeping your gear dry, your camping setups cozy, and your truck bed secure.
But just like your truck itself, a camper shell isn't a "set it and forget it" accessory. If you want it to look great and last for years, you need to show it a little love.
Fortunately, maintaining a camper shell is incredibly easy. Here are the five golden rules of camper shell care to keep your topper in peak condition.
1. The Annual Deep Clean & Wax
At an absolute minimum, you should clean and wax all surfaces of your camper shell once a year.
Over time, UV rays, road salt, bird droppings, and tree sap will take a toll on the fiberglass or aluminum finish.
-
Wash: Use a mild, automotive-safe soap and a soft microfiber mitt to get the grime off.
-
Wax: Applying a high-quality automotive wax not only brings back that showroom shine, but it also creates a sacrificial barrier against sun damage and oxidation.
Pro-Tip: If you live in an area with harsh winters or intense summer sun, bumping this routine up to twice a year (spring and fall) will work wonders for your shell’s lifespan.
2. Keep the Tracks Clear
There is nothing more frustrating than a sticky side window or a rear door that refuses to latch smoothly. Usually, the culprit isn't a broken mechanism—it’s just dirt.
Make it a habit to clean all windows and tracks. Dust, sand, and small debris love to settle into these grooves. Use a stiff brush or a vacuum attachment to clear out the debris, and wipe them down with a damp cloth. This ensures smooth operation and prevents premature wear on the window sliders.
3. Pamper Your Rubber Seals (And Avoid Silicone!)
The rubber seals around your windows and the base of the shell are the only things standing between your expensive gear and a sudden downpour. To keep them from drying out, cracking, and leaking, they need to be cleaned regularly. The seal at the base of your top might even need to be replaced.
However, there is one massive rule here: Do not use any silicone-based cleaners or protectants on your rubber seals.
While silicone might make things look shiny temporarily, it can actually degrade certain types of rubber seals over time and attract dirt like a magnet. Stick to mild soap and water, or use a protectant specifically rated as safe for EPDM rubber seals. We highly recommend Aerospace protectant from 303, it's a water-based silicone-free formula. Sold here in store.
4. Give It a Regular Hardware Check
Think about the vibrations your truck goes through just driving down the highway, let alone hitting a bumpy dirt road. Over time, those vibrations can cause things to wiggle loose.
Periodically check all mounting clamps and hardware to ensure tightness.
-
Inspect the C-clamps or bolt-on systems securing the shell to your truck bed.
-
Check the screws on the window frames and rear door hinges.
-
You don't need to crank them down with superhuman strength (over-tightening can cause damage), but they should be snug and secure.
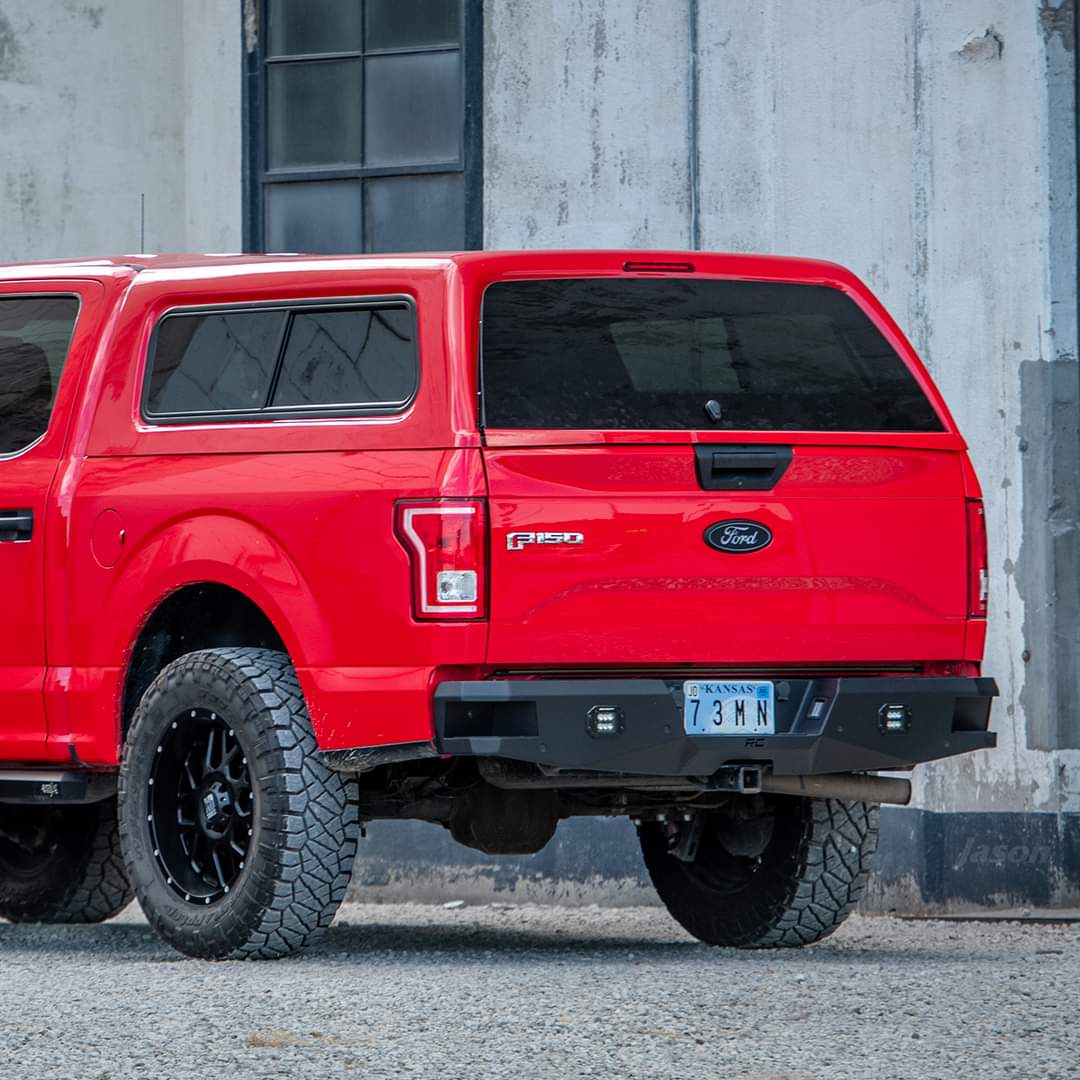
5. Off the Truck? Off the Ground!
There may come a day when you need to take your camper shell off to haul a massive load of mulch or a piece of furniture. When that day comes, handle it with care.
Never set your truck top straight on the ground.
Placing the raw edges of the shell directly on concrete or dirt can scratch the finish, chip the fiberglass, and rip the bottom seal. Instead, always use wooden boards, sawhorses, or a suitable lift to keep the shell elevated and protected while it’s off the truck. We’ll even supply you with the wooden boards and hardware.
Summary Checklist for Quick Reference
|
Component |
Action Required |
Frequency |
What to Avoid |
|
Shell Exterior |
Wash and Wax |
Minimum 1x / year |
Abrasive scrubbers |
|
Window/Door Tracks |
Clean out debris |
As needed |
Letting dirt build up |
|
Rubber Seals |
Wipe down |
Regularly |
Silicone-based cleaners |
|
Mounting Clamps |
Check for tightness |
Periodically |
Over-tightening |
|
Storage |
Elevate on boards/sawhorses |
Whenever removed |
Placing directly on the ground |
By spending just a little time on these five simple steps, you’ll ensure your camper shell stays more weather-tight, functional, and looking sharp for the long haul.